Understanding the Risks of DIY Roofing Projects
Undertaking a roofing project on your own can be a rewarding experience, but it is not without its risks. Understanding these risks is the first step toward ensuring that your safety and well-being are a top priority. Roofing work inherently involves working at potentially dangerous heights, exposing DIY enthusiasts to hazards that require careful preparation and awareness.
One of the most significant risks is falls, which remain one of the leading causes of injuries in construction-related activities. A simple misstep or lapse in focus when walking on a sloped or unstable roof can lead to serious consequences. Uneven surfaces, loose shingles, or unexpected debris can make maintaining balance difficult, especially if proper footwear is not worn.
Another prominent danger comes from exposure to environmental elements. UV radiation from prolonged periods under the sun can lead to heat exhaustion or dehydration, while working in windy conditions increases the risk of losing control over tools or materials. Additionally, wet roofs—whether from rain, morning dew, or condensation—can become slippery and significantly heighten the likelihood of accidents.
Improper handling of tools and roofing materials also poses considerable hazards. Nail guns, hammers, shingles with sharp edges, and heavy equipment require precision and care during use. Without proper training or experience with these tools, there’s potential for accidental injuries such as cuts or punctures.
Electrical dangers often go unnoticed during roofing projects but are equally critical to address. Overhead power lines may pose risks if they are near your property’s roofline. Accidental contact with electrical wiring while removing old materials or installing new ones could result in severe injury.
Lastly, structural weaknesses in your roof can escalate risks further. An unstable roof may not support weight evenly; stepping on a weak spot could result in collapse or injury.
- Familiarize yourself with safe working practices.
- Conduct thorough research on roofing techniques before starting.
- Wear safety harnesses and secure them properly.
- Always check weather forecasts.
- Ensure you have a solid understanding of your roof’s structure before stepping onto it.
Approaching roofing projects without recognizing these inherent risks can lead to costly mistakes—or worse—serious injuries. Preparation and awareness serve as essential defenses against these dangers while empowering you to complete your DIY project safely and successfully.
Essential Safety Equipment for Roof Work
When undertaking a DIY roofing project, having the right safety equipment is not just important—it’s non-negotiable. Working on a roof involves significant risks, and proper gear is your first line of defense against potential injuries. Ensuring you are well-equipped can mean the difference between completing your project successfully and dealing with an avoidable accident.
Hard Hats
A hard hat is essential to protect your head from falling debris or tools. Even if you’re working alone, tools or shingles can accidentally slip and fall, creating hazards. A quality hard hat provides critical protection in such situations.
Non-Slip Footwear
Roof surfaces can be slippery, especially if there’s morning dew, rain residue, or loose gravel. Invest in footwear with a strong grip and slip-resistant soles designed for roofing work. Rubber-soled shoes are ideal for providing traction and stability on sloped surfaces.
Harnesses and Fall Arrest Systems
Falls are among the most common accidents associated with roofing projects. A harness connected to a fall arrest system is crucial for preventing serious injuries. Make sure the harness fits properly and connect it securely to an anchor point rated to bear significant weight.
Safety Glasses
Eye protection is often overlooked but highly important during roofing tasks like cutting or removing materials. Safety glasses safeguard your eyes from dust, debris, or flying particles that could cause irritation or injury.
Heavy-Duty Gloves
Wearing gloves ensures that your hands stay protected from sharp edges of shingles, nails, or other materials involved in roofing work. Gloves also improve grip when handling tools or climbing ladders.
Protective Clothing
Long-sleeved shirts and durable pants provide essential protection for your skin against cuts, scrapes, and exposure to harsh UV rays while working outdoors on the roof.
Proper Tool Storage Solutions
Loose tools scattered around a work site increase trip hazards and may accidentally slide off the roof. Use a tool belt or pouch to keep essential items within reach while reducing clutter underfoot.
Additional Tips for Using Safety Equipment Effectively
- Inspect all equipment before use to ensure there are no signs of wear or damage.
- Familiarize yourself with how each piece of safety gear works before starting the project.
- Check anchor points thoroughly when using safety harnesses.
- Always replace damaged equipment immediately; compromised safety gear should never be used during roofing tasks.
By investing time and resources into the right equipment, you prioritize your well-being while increasing efficiency throughout your DIY roofing project. Each piece of safety gear plays an integral role in protecting you from avoidable risks on what may otherwise be a hazardous task.
How to Inspect Your Roof Before Starting
Before embarking on any DIY roofing project, it is crucial to conduct a thorough inspection of your roof to assess its condition, identify potential hazards, and determine the scope of work required. This preparatory step ensures you can plan effectively, stay safe during the process, and avoid costly mistakes. An informed inspection also minimizes surprises that could derail your project or pose risks.
Assessing the Overall Condition of Your Roof
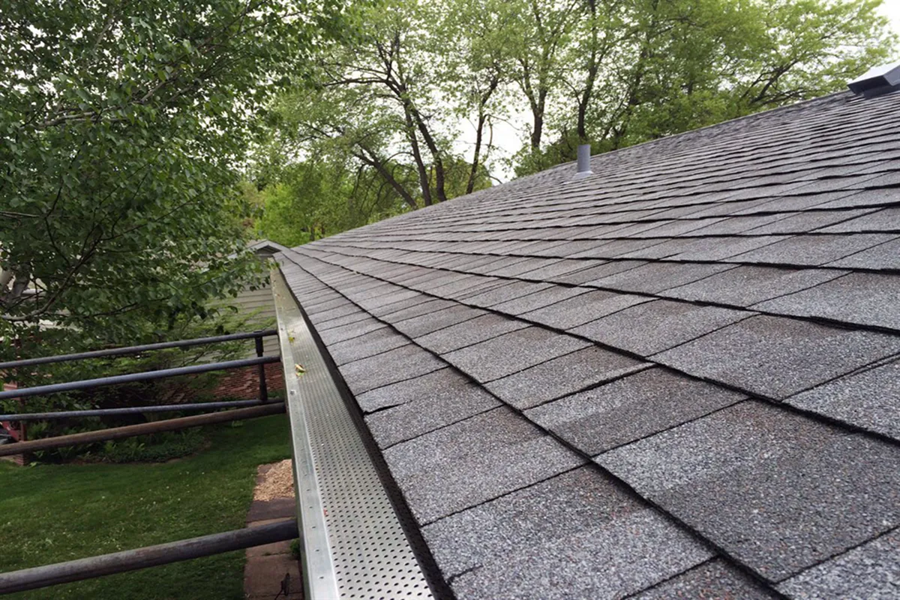
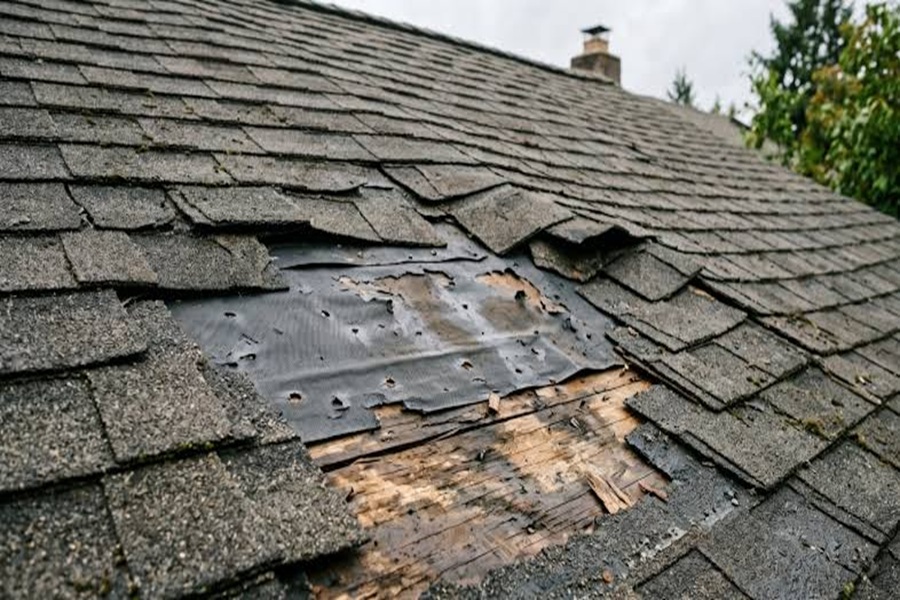
Start by visually inspecting your roof from the ground. Look for noticeable issues such as missing or damaged shingles, sagging areas, discoloration, or loose flashing around chimneys and vents. Use binoculars if necessary to get a closer view without climbing up initially. This preliminary check helps identify visible concerns without putting yourself at risk.
Once you’re ready to get on the roof safely (using proper ladder safety techniques), observe its surface more closely. Check for cracked or curling shingles, soft spots that may indicate water damage or rot underneath, and debris accumulation in valleys or gutters that might impede drainage.
Examining Gutters and Drainage Systems
Clogged gutters can lead to water pooling on your roof or near its edges, causing long-term structural damage. As part of your inspection process, remove leaves and debris from gutters and ensure downspouts are clear. Pay attention to any signs of rusting or sagging in the gutter system as these may need repair before you proceed with further roofing tasks.
Checking for Signs of Moisture Damage
Water infiltration is one of the most common causes of roof deterioration. During your inspection, look for dark stains on shingles or underlayment materials that might indicate moisture absorption. Inside your home’s attic space, check for signs such as mold growth, damp insulation, or visible leaks coming through the roof deck.
Addressing moisture issues early is critical not only for maintaining the integrity of your roof but also for protecting indoor air quality and preventing further structural damage.
Inspecting Flashing and Seals
Examine areas where different sections of your roof meet—such as valleys—and inspect around skylights, chimneys, vents, and other penetrations. Flashing in these locations often deteriorates faster than shingles due to exposure to water runoff and temperature fluctuations. Ensure all seals are intact and secure; failing seals can lead to leaks during heavy rainfall.
Identifying Potential Safety Hazards
As part of your inspection process, be vigilant about identifying risks such as loose tiles or areas with excessive moss buildup that could make surfaces slippery when walking on them. Take note of any weak spots where stepping could cause further damage—or worse—personal injury during repairs.
Document Your Findings
Take detailed notes during your inspection so you have a clear picture of what needs attention before starting work. Photographs are also helpful for documenting problem areas; they allow you to reference issues later without having to repeatedly climb onto the roof.
By taking these proactive steps to inspect your roof thoroughly before starting any DIY repairs or maintenance tasks, you significantly reduce safety risks while ensuring a more efficient workflow throughout the project execution phase.
Ladder Safety Tips Every Homeowner Should Know
Ladders are essential tools for any DIY roofing project, but improper ladder use can lead to severe injuries. Ensuring that you handle your ladder safely is one of the most critical steps in protecting yourself during roof work. With careful preparation and cautious practices, you can significantly reduce the risk of falls and other accidents.
Choosing the Right Ladder for the Job
Selecting the appropriate ladder for your roofing project is vital. Extension ladders are commonly used for roof access because they provide sufficient height and stability. The ladder should extend at least three feet above the edge of the roof to give you a safe handhold when stepping onto or off the roof surface. Additionally, ensure the ladder’s weight rating supports both your body weight and any tools or materials you’ll be carrying.
Inspecting Your Ladder Before Use
Before setting up your ladder, inspect it thoroughly for any signs of damage, such as cracks, bent rungs, or loose hardware. Even minor damage could compromise its structural integrity under pressure. Check that all components, including locks and hinges, are working correctly to prevent unexpected collapses while in use.
Setting Up Your Ladder Properly
Proper placement of the ladder is crucial to its stability. Ensure that it rests on a flat, solid surface. If you’re working on uneven ground or soft soil, consider using a stabilizing device or sturdy board beneath the legs to create a level base. Position your ladder at an angle where it feels secure—follow the 4:1 rule: For every four feet of height from the ground to where your ladder rests against a structure, place its base one foot away from the wall.
Using Your Ladder Safely
While climbing or descending ladders during a roofing project, always maintain three points of contact—two hands and one foot or two feet and one hand—at all times. Avoid overreaching while working from a ladder; instead, take time to reposition it as needed to keep your body centered within its side rails. Wearing shoes with non-slip soles provides better grip and can help prevent slips when climbing.
If you’re using an extension ladder secured against your home’s guttering system or siding, be cautious not to place excessive weight on these areas as it may cause damage to those materials.
Avoiding Dangerous Practices
- Never climb on a wet or unstable ladder; wait until conditions improve.
- Limit carrying heavy tools while climbing by using tool belts or pulley systems instead.
- Do not attempt makeshift repairs like taping cracked rails; replace damaged ladders entirely.
By following these guidelines for safe setup and usage, homeowners can confidently tackle their roofing tasks without unnecessary risks associated with improper ladder handling.
Working Safely in Different Weather Conditions
Roofing projects require careful planning and preparation, especially when it comes to working in various weather conditions. The weather not only impacts the safety of a DIY enthusiast but also affects the quality and durability of the work. Understanding how to assess and adapt to different conditions is critical for avoiding potential accidents and ensuring successful results.
Preparing for Hot Weather
- Hydration is Key: Drink plenty of water before, during, and after your project. Avoid caffeinated or sugary drinks as they can dehydrate you.
- Dress Appropriately: Wear lightweight, breathable clothing that offers UV protection. A wide-brim hat and polarized sunglasses can also shield you from harmful sunlight.
- Sunscreen Application: Always apply a high-SPF sunscreen to any exposed skin to minimize sunburn risks.
- Schedule Smartly: Work during cooler parts of the day, such as early morning or late afternoon, and take frequent breaks in shaded areas.
Tackling Cold Weather Roofing
- Use Insulated Clothing: Wear layers that provide warmth but allow mobility. Insulated gloves with good grip are essential for maintaining dexterity while handling tools.
- Check for Ice Hazards: Inspect your roof carefully for ice patches or snow accumulation before stepping onto it.
- Choose the Right Footwear: Non-slip insulated boots will keep your feet warm while reducing the risk of slipping on frozen surfaces.
Be aware that asphalt shingles become brittle in low temperatures, which can lead to cracking during handling or installation. If possible, wait for a warmer day when materials are easier to work with.
Rainy Day Precautions
- Postpone if Necessary: It’s better to delay the work than risk injury from wet surfaces.
- Use Slip-resistant Tools and Footwear: If rain is forecasted but unavoidable, ensure you’re equipped with tools designed to grip slick surfaces safely.
- Protect Your Materials: Cover unused shingles or other materials with waterproof tarps to prevent damage.
Dealing with Windy Conditions
- Monitor Wind Speeds Closely: Check local weather reports regularly throughout your project day.
- Secure Loose Items: Make sure all tools, ladders, and materials are anchored properly so they don’t become airborne hazards.
- Avoid Large Gusts: If sudden gusts occur frequently, postpone your efforts until conditions stabilize.
Storm Preparation Tips
- Always review forecasts leading up to your project day. This not only ensures personal safety but prevents potential water damage from an incomplete job if rain suddenly arrives mid-task.
By taking appropriate measures based on weather conditions, you’ll create a safer environment for yourself while ensuring better results from your roofing efforts. Being mindful of external factors like temperature fluctuations or precipitation plays an integral role in executing effective DIY roofing projects safely.
Common DIY Roofing Mistakes That Lead to Injuries
Tackling a roofing project on your own can be both rewarding and cost-effective, but it comes with its fair share of risks. Many DIY enthusiasts, eager to complete the job quickly or save money, overlook critical details that can lead to serious injuries or property damage. Understanding these common mistakes is key to avoiding them and ensuring your safety.
Skipping Proper Risk Assessment
One of the most frequent errors in DIY roofing is failing to assess the risks beforehand. Many homeowners dive into their projects without carefully evaluating the condition of their roof or considering potential hazards in their workspace. A thorough inspection of the roof’s structure, noting any weak spots or potential fall risks, is a crucial first step.
Using Inadequate or Improper Tools
Roofing requires specific tools for tasks such as shingle removal, nailing, and sealing. Improvising with tools not designed for roofing can lead to inefficiency, physical strain, and even accidents. For example, using a standard household hammer instead of a roofing nailer increases both labor time and the chances of injury due to mishandling.
Neglecting Safety Gear
Another major mistake is foregoing essential safety equipment like harnesses, helmets, or non-slip footwear. Many assume that being cautious is enough protection at height; however, an unexpected slip can happen in an instant. Investing in proper safety gear tailored for roof work greatly reduces the chance of severe injuries.
Overloading Roof Surfaces
DIY enthusiasts sometimes overload roofs with unnecessary weight from materials or equipment. This not only risks structural damage but also puts individuals at risk if weak areas give way under pressure. Always distribute weight evenly and avoid crowding work areas with excess supplies.
Underestimating Weather Conditions
Weather plays a significant role in roofing safety. Attempting repairs during high winds or right after rainfall when surfaces are slippery is a recipe for disaster. Even moderate heat can cause dehydration or heat exhaustion if precautions aren’t taken.
Working Alone
Roof repairs often require more than one person for maximum safety and efficiency. Attempting these tasks solo means no one will be available to assist you in case of an emergency like a fall or sudden injury.
Poor Ladder Placement
Many injuries occur before DIYers even step onto the roof due to improper ladder use—placing ladders on uneven ground or failing to extend them adequately above the edge of the roof creates a dangerous situation.
Avoiding these mistakes starts with preparation and education about proper procedures before beginning any roofing task. Recognizing your limitations and prioritizing safety will not only protect you from harm but also ensure your project runs smoothly without unnecessary setbacks.
When to Call a Professional Roofing Contractor
Embarking on a DIY roofing project can be empowering and cost-effective, but there are times when reaching out to a professional roofing contractor is the smarter, safer choice. Understanding when to step back and call in experts can save you time, money, and potentially prevent serious injuries or costly mistakes. Below are key circumstances when hiring a professional becomes essential.
Lack of Experience or Specialized Knowledge
Roofing tasks demand precision, skill, and an understanding of structural integrity. If you lack prior experience or only have limited knowledge about roofing techniques and materials, taking on the job yourself can lead to improper repairs, shoddy installations, or structural damage that worsens over time. Professional contractors are trained to handle these intricacies with care and expertise.
Complicated Roof Designs or Steep Slopes
Not all roofs are straightforward in their design. Homes with steeply pitched roofs, multiple gables, dormers, chimneys, skylights, or other complex architectural features require advanced skills and techniques that go beyond most DIY capabilities. Attempting work on such roofs without proper training increases the risk of falls and errors. Experienced contractors have specialized equipment and training to navigate these complexities safely.
Severe Damage or Structural Issues
Minor repairs like replacing a few shingles might be manageable for an enthusiastic DIYer. However, major issues like widespread leaks, sagging rooflines, rotting underlayment material, or damage following storms require professional assessment. These problems often involve significant structural repairs that demand expertise in construction as well as roofing.
Time Constraints
DIY roofing projects often take much longer than anticipated due to inexperience or unforeseen challenges. A task that might take you several weekends could be completed by professionals within hours or days because they have the tools and team required for efficiency. If time is critical—such as before an approaching storm—it’s better to hire someone who can act swiftly without compromising quality.
Safety Concerns
Safety should always take precedence over cost savings or personal pride in completing a project yourself. Working at heights comes with inherent risks such as falls or equipment mishandling. Some situations—like replacing large portions of damaged roofing during high wind conditions—are simply too dangerous for someone without adequate safety measures in place.
Warranty Preservation
If your roof is still under warranty from its original installation or previous repairs, taking matters into your own hands could void that coverage. Many manufacturers specify that repair work must be performed by licensed professionals to keep warranties intact.
When Costs Might Escalate Unexpectedly
While DIY may initially seem more affordable than hiring a contractor, mistakes made during the process can escalate costs significantly over time. Improper installations may lead to additional damage requiring professional intervention later on—and fixing those errors often ends up being more expensive than addressing the issue correctly from the start.
Insurance Requirements
In some cases where insurance claims are involved—such as storm damage—it’s common for policies to require assessments and repairs conducted by certified contractors before approving claims for reimbursement.
Calling a professional roofing contractor doesn’t mean admitting defeat; rather it reflects sound judgment about your safety limits and practical considerations for protecting your home investment effectively. By recognizing when it’s best to leave certain tasks in capable hands while focusing on less risky aspects of home improvement yourself, you’ll ensure peace of mind along with long-lasting results for your roof’s health.